
How to Reset Local Group Policies and Security Policies in Windows 11 and Windows 10
Many Windows tweaks and advanced settings that aren’t normally available from the GUI require adjusting local group policy settings or security policies. Occasionally, things go wrong.
If Windows 11 or Windows 10 doesn’t work the way it should after you were messing around with changing settings via Group Policy editor, Registry editor or using tweaking apps, you may need to reset local group policies and/or security policies. Here are three ways to reset those policies to defaults.
Table of Contents
Manually Reset Local Group Policies using Group Policy editor
The first method is to use the built-in Group Policy Editor that is only available in Windows 11/10 Pro and Enterprise editions.
Only Administrative Templates polices can be reset using this way, but since most system tweaks adjust only these policies it might be enough to follow the steps below:
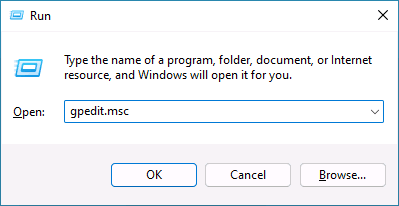
- Right-click Start button and select “Run” from context menu. Type gpedit.msc in the Run dialog and then hit Enter to open Group Policy Editor.
- Navigate to Computer Configuration\Administrative Templates\All Settings section.
- Sort available settings by clicking “State” header in the right-hand pane so that Enabled and Disabled policy settings are at the top of the list.
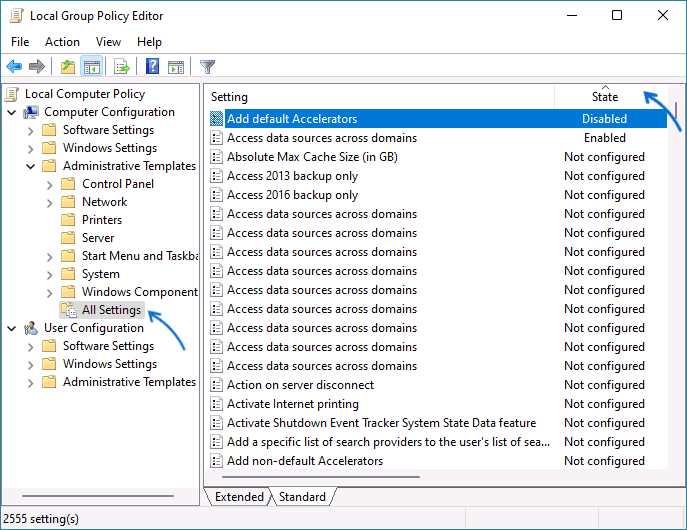
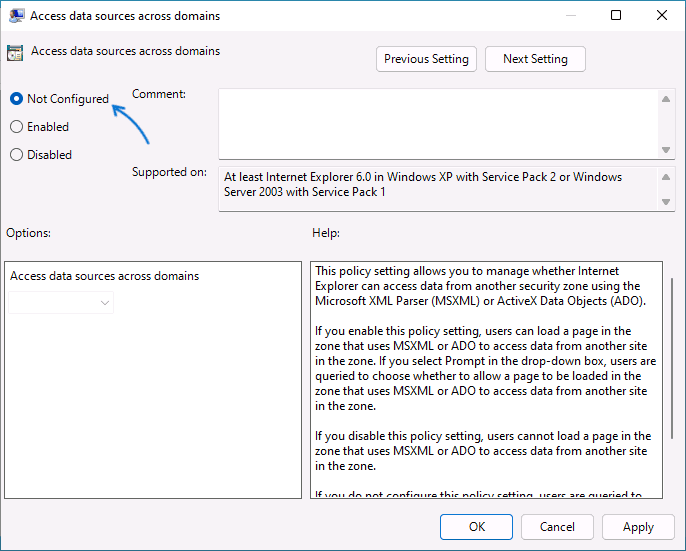
- The default setting for every item is “Not configured”. You can reset each policy setting by double-clicking it, selecting “Not configured”, and applying new setting.
- Repeat steps 3-4 in User Configuration\Administrative Templates\All Settings section.
After that, close Group Policy Editor, and you’re done. You’ll sometimes need to reboot you PC for changes to take effect.
How to Reset Local Security Policies
There’s no need to use gpedit.msc or secpol.msc tools to reset local security policies. Windows keeps default settings in a database you can apply using Command Prompt.
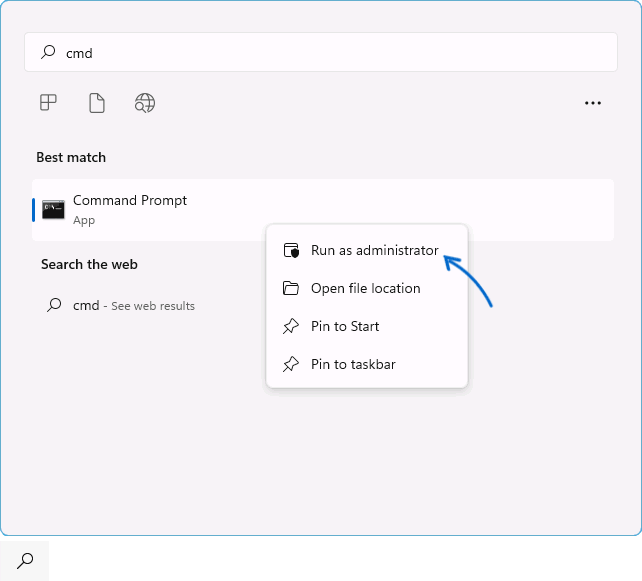
- Open Command Prompt as Administrator privileges. Type “cmd” into the search box, right-click the result and select “Run as Administrator”
- Type the following command at the Command Prompt and press Enter:
secedit /configure /cfg %windir%\inf\defltbase.inf /db defltbase.sdb /verbose
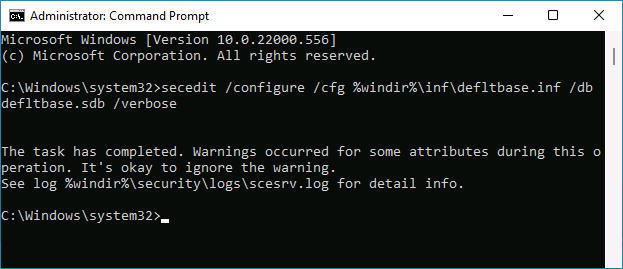
If you get a “The task has completed” message, you have successfully reset security policies.
Deleting Local Group Policies to Restore Defaults
Windows loads Local Group Policies into the registry from C:\Windows\System32\GroupPolicy and C:\ Windows\System32\GroupPolicyUsers\ folders. Removing the folders and updating policies will reset them to defaults.
Start by launching Command Prompt as Administrator. Then, type the following three commands while pressing Enter after each line:
RD /S /Q "%WinDir%\System32\GroupPolicy"
RD /S /Q "%WinDir%\System32\GroupPolicyUsers"
gpupdate /force
If you encounter any errors while running the commands, you can repeat the above steps after booting into safe mode.
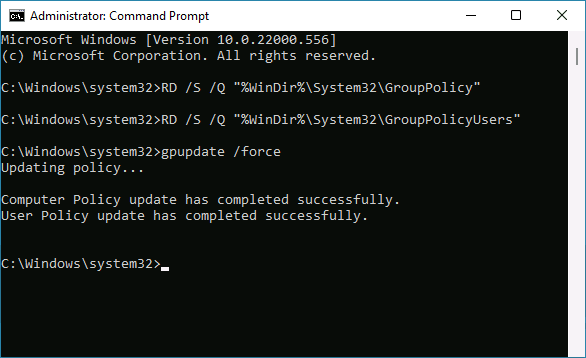
Hopefully, Command Prompt will show two messages: “Computer Policy update has completed successfully. User Policy update has completed successfully” and you’re done resetting the Local Group Policies.


Comments