How to Fix “You Require Permission From TrustedInstaller to Make Changes to This Folder”
When you attempt to delete or rename certain system folders in Windows 11 and Windows 10, you may encounter a "Folder Access Denied" message indicating that you require permission to carry out the action. The following step-by-step guide specifies two methods for deleting or modifying such folders and the files within them.
Warning: Windows system folders that require TrustedInstaller's permission for actions can cause operating system malfunctions if removed or renamed. Therefore, make sure that you correctly identify the folders or files you intend to modify or delete.
Table of Contents
Take Ownership and Assign Permissions Using GUI
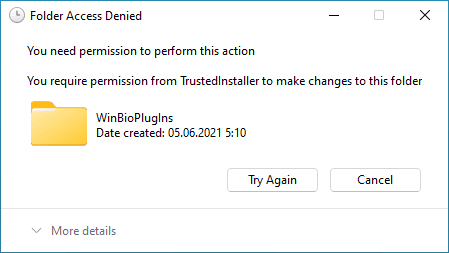
First option to delete the folder that make the “You require permission from TrustedInstaller to make changes to this folder” message appear, is to adjust folder’s security settings via Windows 10 or Windows 11 GUI. Here is how:
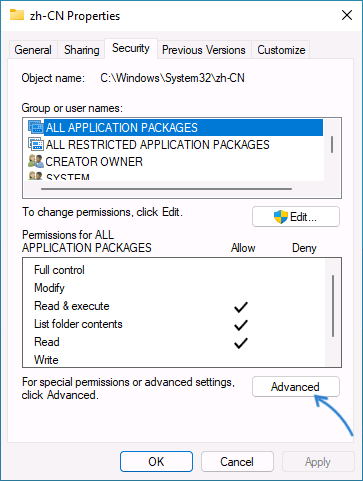
- Right-click the folder and select “Properties” from context menu.
- On “Security” tab click “Advanced” button.
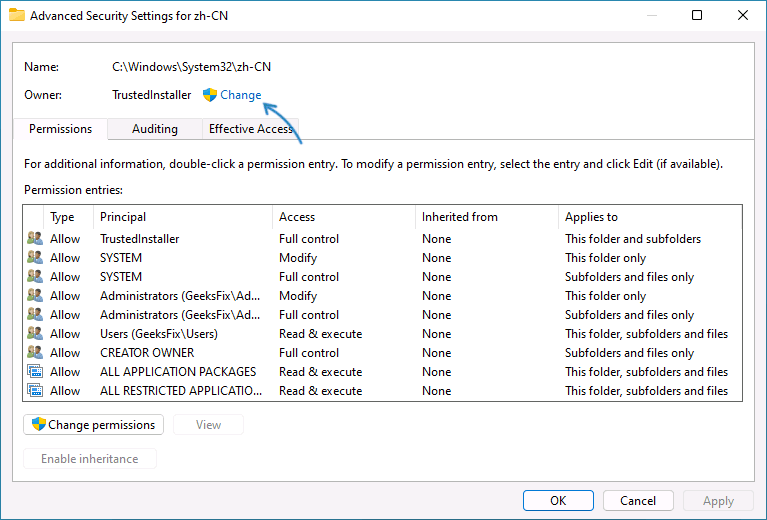
- Click “Change” link in the “Owner” section. You need to be an Administrator to perform this action.
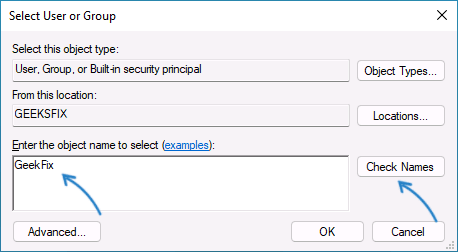
- Type your username (or your E-mail if you’re using Microsoft account) in the “Enter the object name to select” area, click “Check Names” and if the username typed changed to Computer name / Username, click Ok button.
- Check “Replace owner on subcontainers and objects” option and click Ok.
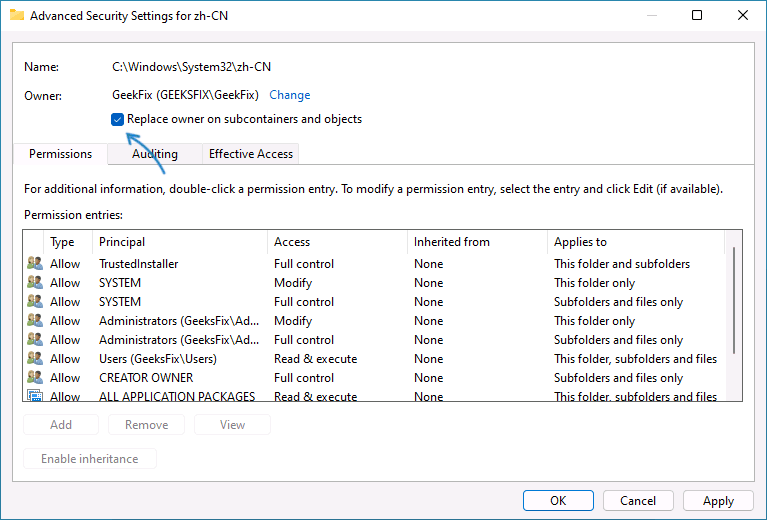
- Confirmation dialog may appear. Confirm the action, click “Ok” in folder’s security properties, then open the security properties window again. Yes, we need to close it with Ok and then reopen for the next steps to run smoothly.
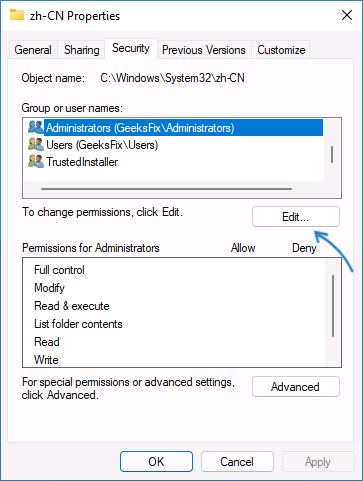
- Next, we have 2 options. If there’s “Administrators”, “Users” or your specific username in the “Group or user names” list, click “Edit” button below the list.
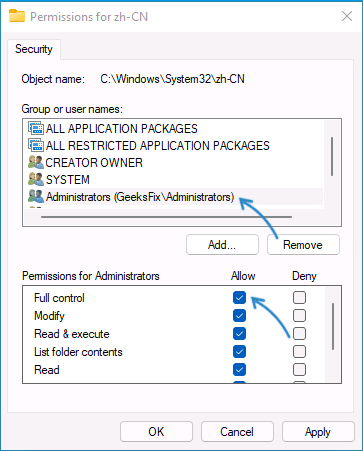
- Select any of the above-mentioned groups or user names (Administrators, preferably), allow full control, and click “Ok”. Confirm changing the permissions settings, then click “Ok” in folder properties window and try making the changes you were about to do before the “You require permission from TrustedInstaller” message.
- If steps 7-5 it didn’t work or not applicable, open “Security” tab in folder’s properties once again and click “Advanced” button.
- Click “Change permissions” button below the permission entries list then click “Add”.
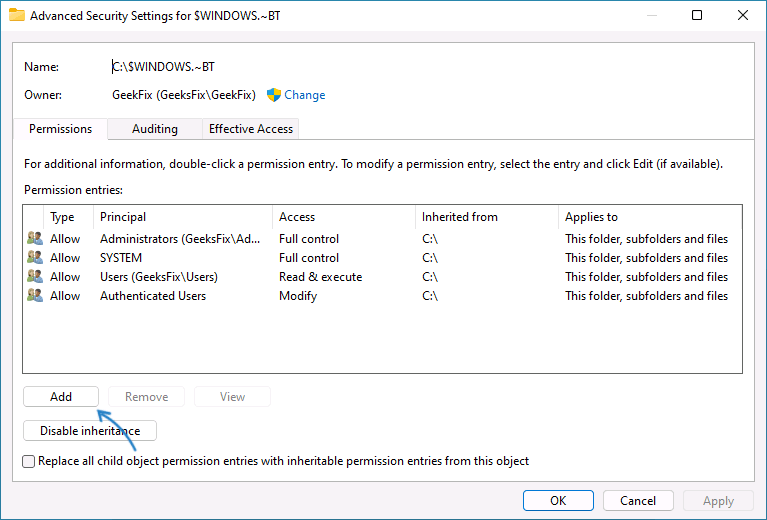
- Click “Select a principal” and make the same actions we did in step 4 to add your username.
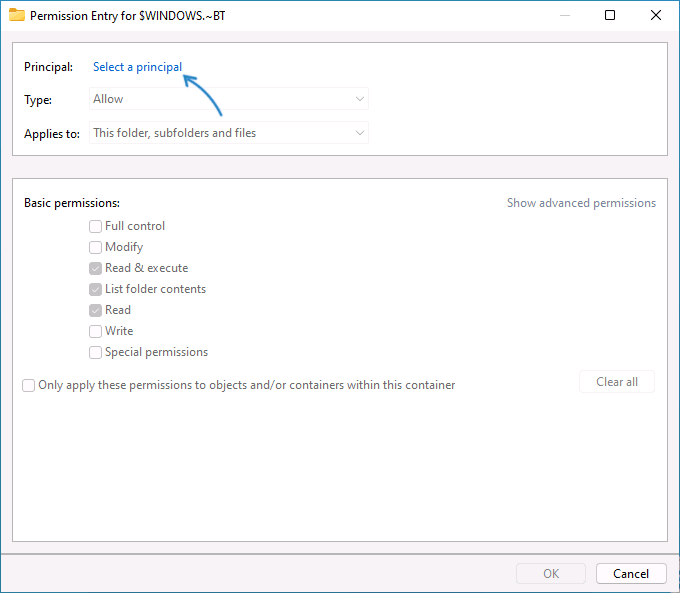
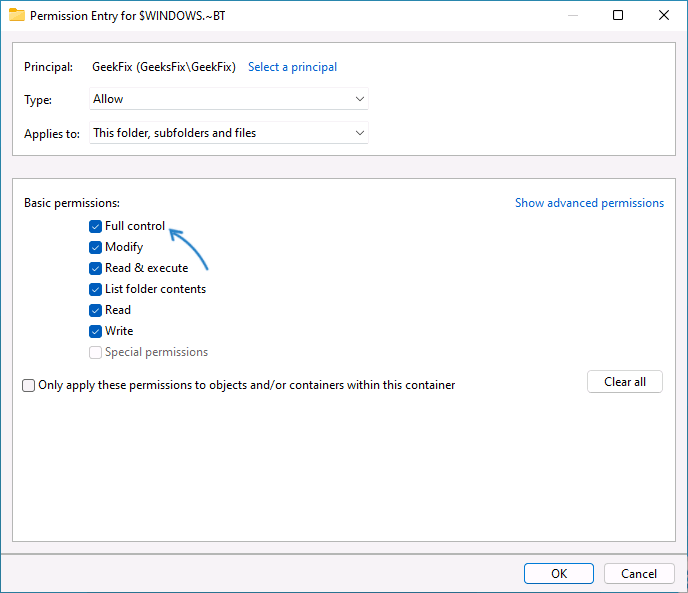
- Set “Full control” basic permissions and click “Ok”.
- Check “Replace all child object permission entries with inheritable permission entries from this object” and confirm changes by clicking Ok button.
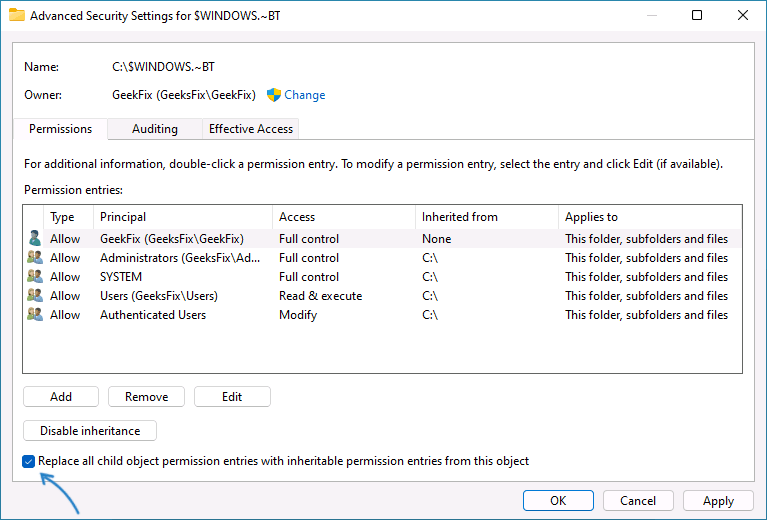
- Confirm replacing explicitly defined permissions and you’re done.
Not as straightforward as you might hope it to be, but it works and now you have full control over the folder.
Use Command Prompt to Gain Access to the TrustedInstaller Protected Folder
Second method to fix “You require permission from TrustedInstaller to make changes to this folder” is to gain full access to folder and its contents using the Command Prompt:
- Type “cmd” in Windows search, right-click the result and select “Run as administrator”.
- In the Command Prompt type the following command, changing FOLDER_PATH to actual full path to the folder you need gain access to
If the folder name contains spaces, you should use quotes like in this example: takeown /F "C:\Folder With Spaces\*" /R /Atakeown /F FOLDER_PATH\* /R /A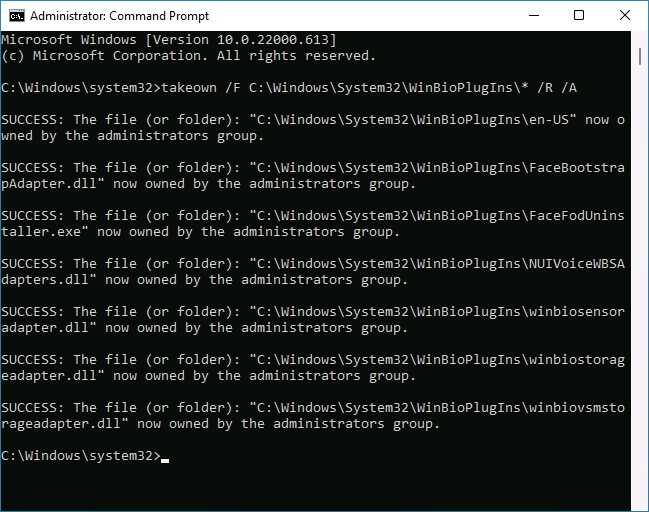
- The above command will set Administrators group as the owner of the folder. Next step is to grant access to it to the same group using the next command:
icacls FOLDER_PATH\*.* /T /grant Administrators:F - Now you’re in full control of the folder. To delete it you can use the
command. Using the Windows Explorer is also possible to make changes to the folder.rmdir /S /Q FOLDER_PATH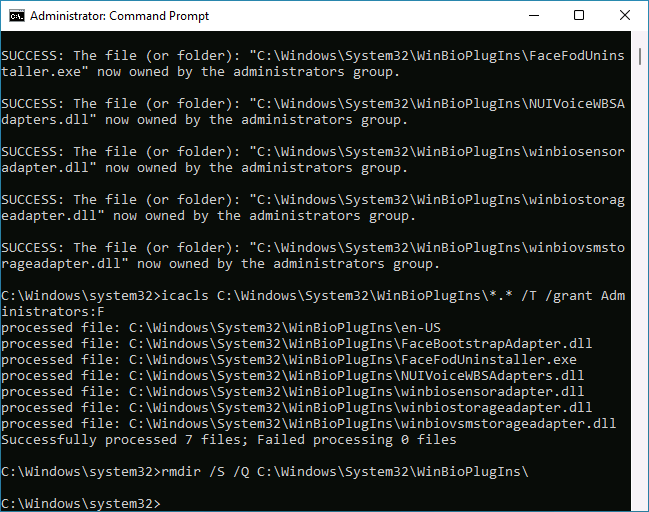
As you can see, it is possible to delete or otherwise change system folders but I cannot recommend most users to do this.


Comments